
Authentic Chilaquiles Recipe: Crispy, Saucy Mexican Breakfast Done Right
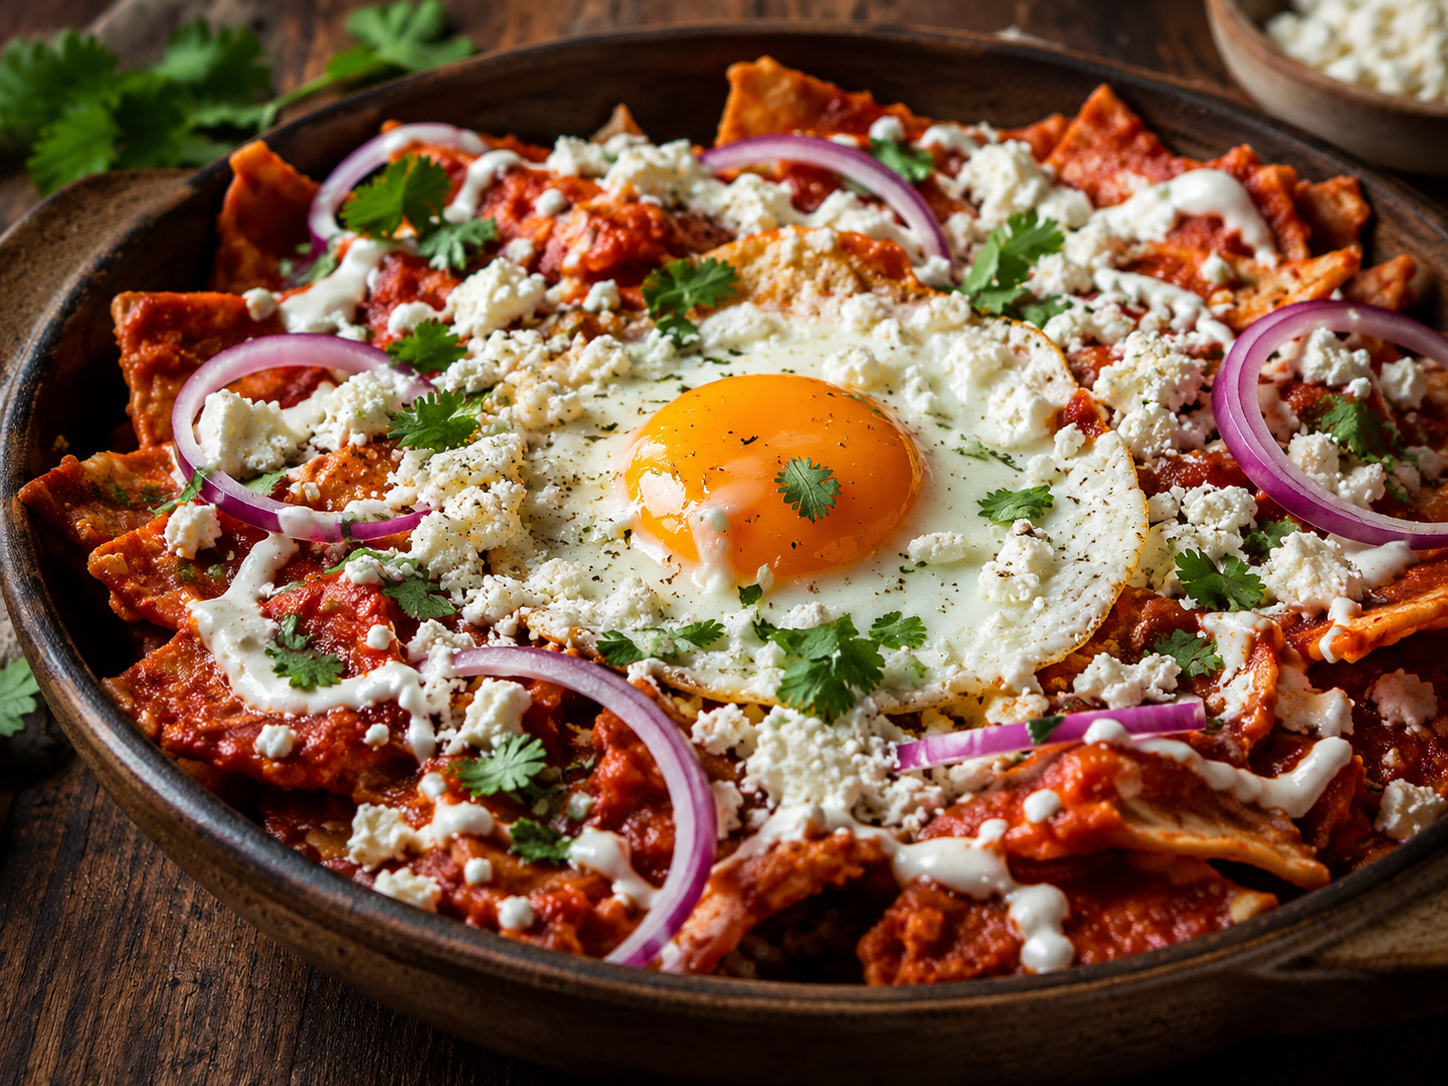
There is something quietly brilliant about a recipe that was invented to solve a logistics problem. Chilaquiles were born in Mexican kitchens as the definitive answer to day-old corn tortillas — a zero-waste breakfast that turns pantry staples into something genuinely extraordinary. For a busy professional, that principle translates directly: this is a 30-minute weekend breakfast requiring minimal prep, zero specialized equipment, and enough protein from the fried eggs to fuel a productive morning without thinking about food again until lunch. When your schedule is already making every decision for you, breakfast should not be one of them.
Rosalina’s Kitchen Note: My first attempt at chilaquiles was a soggy disaster — I soaked the tortillas too long in the sauce. The fix is timing: add the chips to the salsa right before serving and toss just once. They should still have a slight crunch at the edges. That 30-second window between crispy and soggy is what separates good chilaquiles from great ones.
The secret to a perfect chilaquile recipe is the texture contrast of the tortilla chips. Instead of using thin store-bought chips that turn soggy instantly, fry thick corn tortillas at home and toss them in hot, simmering salsa roja for only 30 seconds — they absorb the rich flavors while retaining a satisfying, crunchy bite. In Mexico, no dish represents the ultimate weekend comfort quite like chilaquiles, born as a brilliant zero-waste solution to day-old corn tortillas. For more authentic Mexican comfort food, explore our Authentic Bistec en Salsa Recipe next.
The Food Science Behind Perfect Chilaquiles
Why Stale Tortillas Are Superior — Not a Compromise
Counter-intuitively, slightly dry or day-old corn tortillas produce dramatically better totopos than fresh ones. Fresh tortillas retain high moisture content (roughly 40–45%), which causes excessive oil absorption during frying and produces a softer, greasier chip. Dry tortillas have pre-lost that surface moisture, which means they flash-fry in the hot oil rather than slowly steaming from the inside out. The result: a structurally rigid chip that can withstand the 30-second salsa toss without turning to mush. This is precisely why authentic Mexican kitchens always used yesterday’s tortillas — it was not scarcity, it was technique.
Charring as Flavor Architecture
Dry-charring tomatoes, serranos, and onion on a hot comal or skillet does two separate things simultaneously. First, it triggers the Maillard reaction on the vegetable surface, creating hundreds of new aromatic compounds that add roasted, smoky depth. Second, the intense heat caramelizes the natural fructose and glucose in the tomatoes, converting them into complex bitter-sweet compounds that balance the sauce’s acidity. Blending all of this into the salsa means every molecule of that developed flavor transfers directly into the sauce — and from there, into every chip.
The 30-Second Toss Window: Precision Matters
The chip toss is the most time-sensitive step in the entire recipe. Too short (under 20 seconds) and the chips remain dry, refusing to absorb the salsa’s flavor. Too long (over 60 seconds) and osmosis draws salsa moisture deep into the chip structure, collapsing the starch network and producing soggy, uniform mush. The 30–45 second window is the precise zone where the exterior edges of each chip soften and absorb flavor while the dense interior core retains its crunch. Work quickly, and serve immediately.
Ingredients for This Chilaquile Recipe
- Corn Tortillas: Look for thick, yellow corn tortillas. Slightly dry or stale tortillas are actually perfect — they absorb less oil during frying.
- Roma Tomatoes & Serrano Chiles: The foundation of our Salsa Roja. For a milder green version (Salsa Verde), swap for tomatillos and jalapeños.
- Cotija Cheese: A dry, salty, crumbly Mexican cheese. High-quality Greek feta makes a respectable substitute.
- Mexican Crema: Thicker and sweeter than sour cream. Substitute with sour cream thinned with a splash of milk and lime juice.
How to Make Chilaquiles — Step by Step
Step 1: Fry the Tortilla Totopos
Cut 12 corn tortillas into 6 triangular wedges each. Heat neutral frying oil in a large skillet over medium-high heat. Fry tortilla triangles in small batches for 2–3 minutes until deeply golden-brown and crispy. Drain on paper towels and season with a pinch of sea salt.
Step 2: Roast and Blend the Salsa
In a dry, hot skillet, place the whole tomatoes, serrano peppers, half an onion, and unpeeled garlic cloves. Char for 6–8 minutes, turning occasionally, until dark spots develop. Peel the garlic, then transfer all charred vegetables with 1/2 cup of water into a blender. Blend until smooth.
Step 3: Simmer and Thicken the Salsa
Heat one tablespoon of oil in a deep pan over medium heat. Pour in the blended salsa. Bring to a boil, then reduce heat and simmer for 10 minutes until the sauce deepens in color and thickens slightly. Season with salt and cumin.
Step 4: Toss the Tortillas
Turn off the heat. Pour the warm, crispy fried tortilla chips directly into the hot salsa. Gently fold with a spatula for exactly 30–45 seconds. The goal is to coat every chip thoroughly so the edges soften slightly while the core remains beautifully crisp.
Step 5: Plate and Assemble
Divide the saucy tortillas immediately onto serving plates. Top each portion with a freshly fried sunny-side-up egg or scrambled eggs. Garnish generously with crumbled cotija cheese, drizzled Mexican crema, finely sliced raw red onion rings, and fresh cilantro leaves. Serve immediately.
Nutrition Facts (Per Serving)
| Nutrient | Amount |
|---|---|
| Calories | 460 kcal |
| Protein | 18 g |
| Fat | 22 g |
| Carbohydrates | 44 g |
| Fiber | 5 g |
Storage, Meal Prep & the Components Strategy
Why Assembled Chilaquiles Cannot Be Stored
Unlike most dishes in this collection, assembled chilaquiles do not store well — and this is not a flaw, it is physics. The moment fried tortilla chips are coated in hot salsa, osmosis begins transferring liquid into the chip’s starch matrix. Within 20 minutes at room temperature, the texture degrades irreversibly. By the next morning, assembled leftovers are uniformly soft. Store components separately instead.
Component Storage Protocol
Fried totopos keep well in an airtight container at room temperature for up to 3 days — do not refrigerate, as moisture in the fridge will soften them. The roasted salsa roja stores beautifully in a sealed glass jar in the refrigerator for up to 5 days, and the flavor actually deepens as the charred compounds continue to meld. When ready to serve again, reheat the salsa to a simmer, re-fry the chips if needed for 30 seconds in a dry pan, and execute the final toss fresh.
Meal Prep Angle: Batch Salsa on Sunday
The salsa is the most time-intensive component (15 minutes). Making a double batch on Sunday — 8 tomatoes, 4 serranos, full onion — gives you ready-to-use salsa roja for the entire week. Beyond chilaquiles, the same salsa works as a shakshuka base, taco sauce, or braising liquid for chicken. Total Sunday prep investment: 15 minutes. Meals unlocked: 4–6.
Frequently Asked Questions
What is the difference between Chilaquiles and Migas?
While both feature tortillas and eggs, Migas consists of crispy tortilla strips scrambled directly into the eggs. Chilaquiles features fried tortilla chips tossed in a warm salsa, with the eggs served as a separate topping on top.
How do I make chilaquiles without deep-frying?
Brush your cut tortilla wedges lightly with avocado oil and bake them in a single layer at 400°F (200°C) for 10–12 minutes, or air-fry them until highly crispy before tossing in the salsa.
Can I add beef chorizo to this chilaquile recipe?
Yes! Sauté high-quality beef chorizo in a pan until crispy, then scatter it over the top of the saucy tortillas alongside the cotija cheese for an extra savory punch.
Further reading: starch gelatinization.
Love Mexican breakfast? Also try our Cheesy Breakfast Skillet, the vibrant Mexican Corn Salad, or our fiery Spicy Green Chile Chicken Burgers.
According to FoodSafety.gov, egg-based dishes must reach an internal temperature of 71°C (160°F) for complete food safety.
According to FoodSafety.gov, dishes containing eggs should reach an internal temperature of 71°C (160°F) for complete food safety.
This post may contain affiliate links. If you make a purchase through these links, we may earn a small commission at no extra cost to you. See our Affiliate Disclosure for details.
Recipe Info & Nutrition
Per serving — estimated values